Sharing withinSoloFire
We know how important it is for sales reps to keep the conversation going after meetings and presentations. Here at SoloFire, we’ve made it easy for you to do just that. You can share content with your customers within seconds. Let’s go over everything you need to know about sharing content within SoloFire.

Adding Content to the Share Queue
To share within SoloFire, you first need to add files to your share queue.
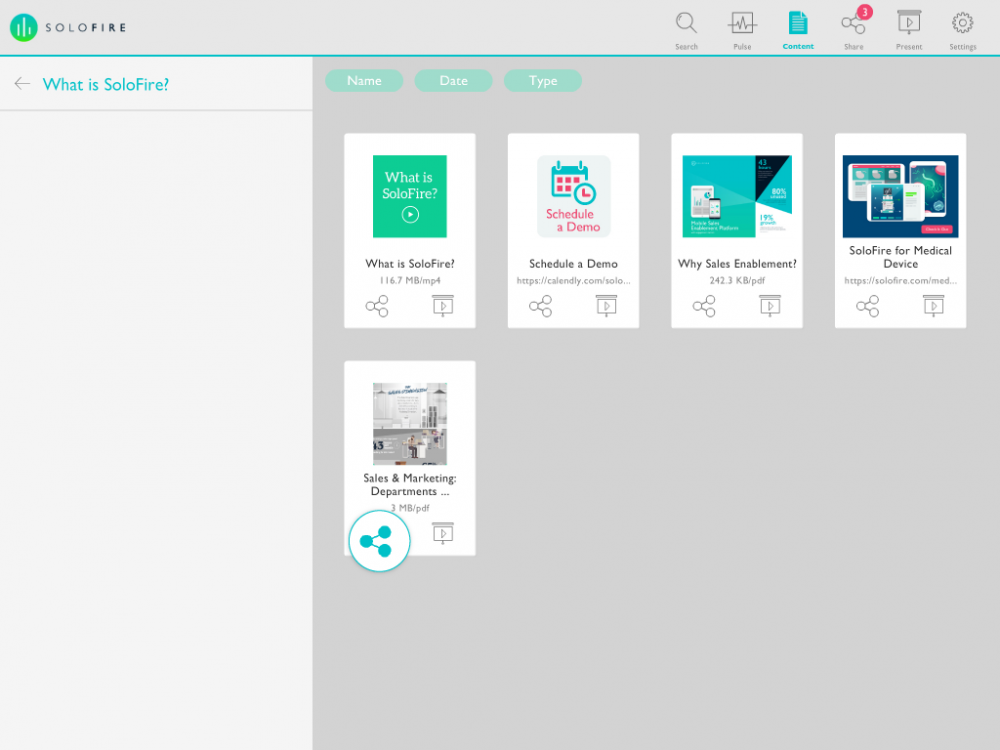
- Navigate to the files you want to add to your share queue
- Add it to the share queue by clicking the share icon
Once you have added files to your cart that you want to share, click Share located in the upper right-hand navigation. From here you can pick to share via email, share via text, or share via link.
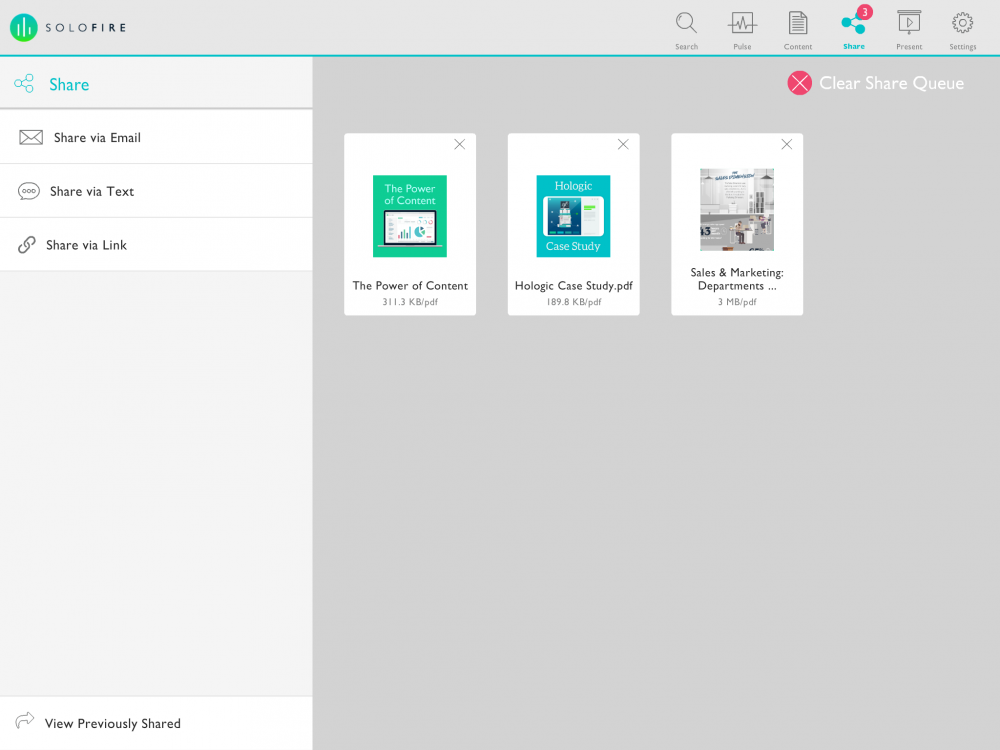
Sharing Content via Email
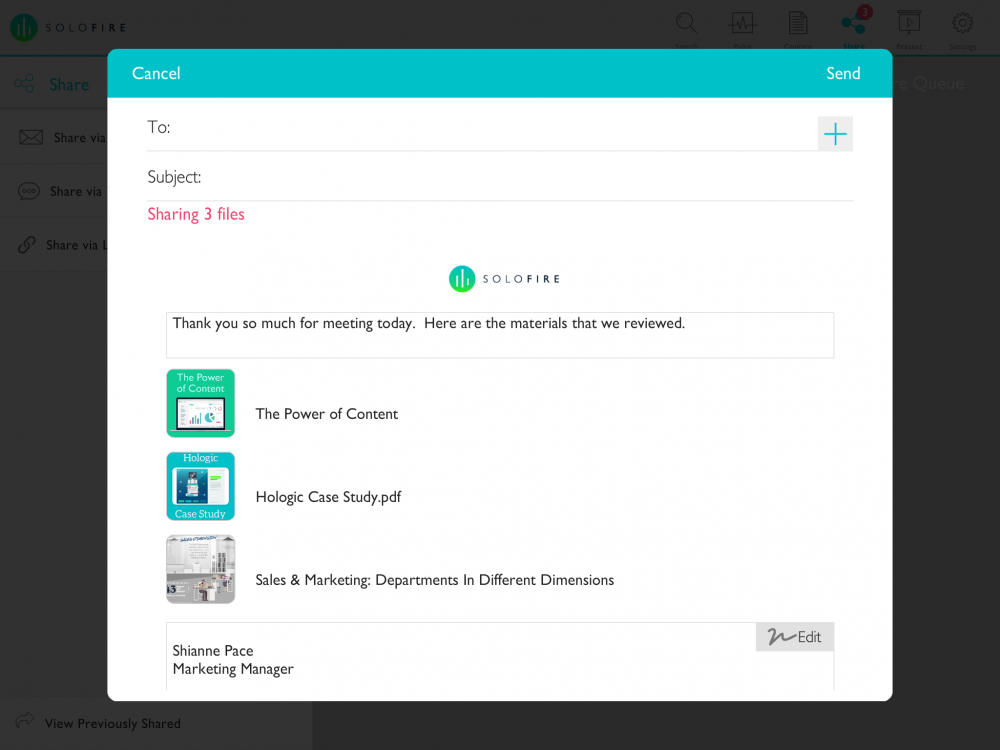
- After you have added files to your cart that you want to send click Share located in the upper right-hand navigation
- On the left-hand navigation click Share via Email
- Enter in the email address(es) and the subject
- Next type the body of the email and then your signature
- Click Send
Sharing Content via Text
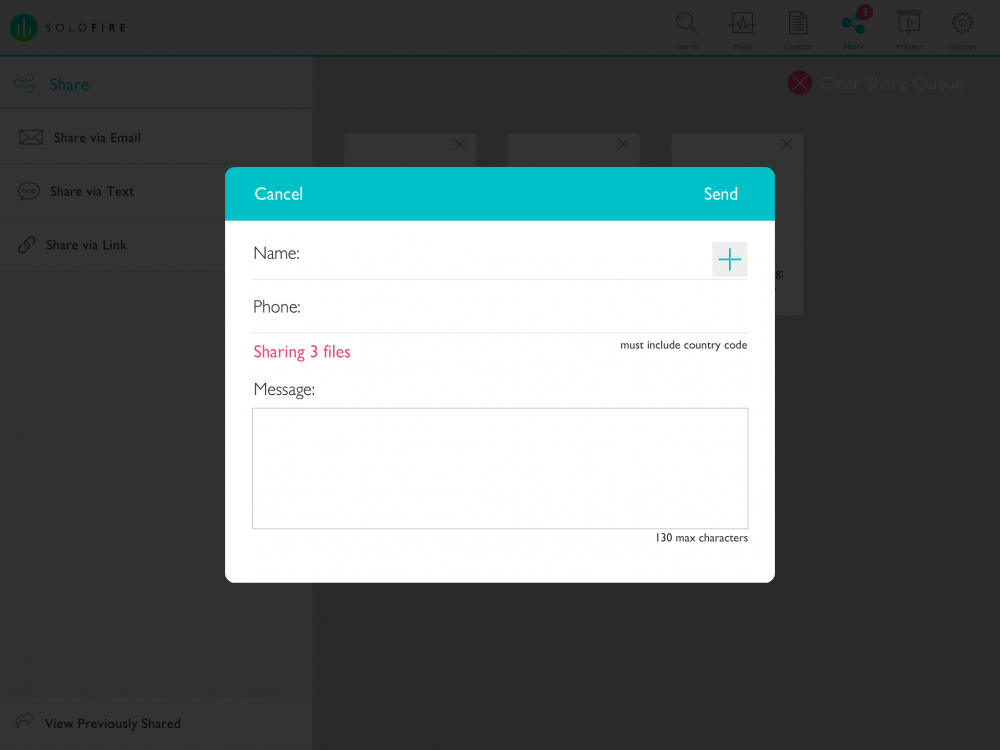
- After you have added files to your cart that you want to send click Share located in the upper right-hand navigation
- On the left-hand navigation click Share via Text
- Enter in the name(s) and phone number(s)
- Next type your message, the file link will send with it
- Click Send
Sharing via Link
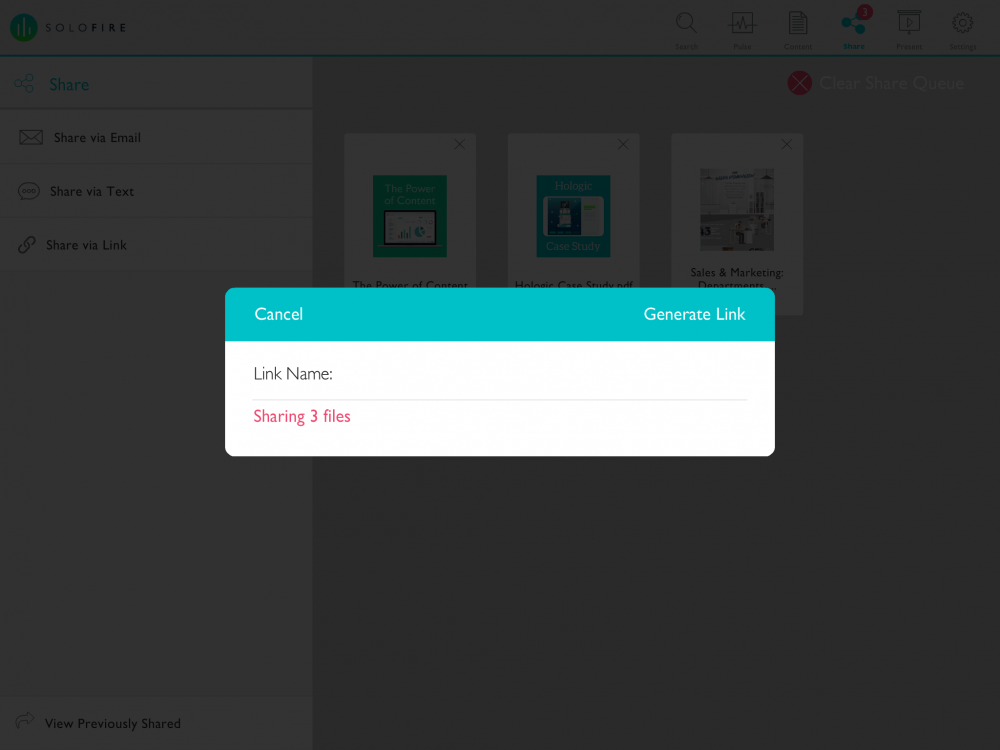
- After you have added files to your cart that you want to send click Share located in the upper right-hand navigation
- On the left-hand navigation click Share via Link
- Enter in the link name and click Generate Link
- This will generate a link that you can copy and paste it anywhere you want. Like in an email, text message, or on social media.


